How to Create an Index
An index in a book is a systematic list of terms, names, subjects, and topics discussed in the book, along with the corresponding page numbers where those topics can be found. It serves as a reference tool to help readers quickly locate information within the book.
Key Features of an Index:
-
Alphabetical Order: Entries in an index are typically listed in alphabetical order to facilitate easy searching.
-
Main Entries and Subentries:
- Main Entries: These are the primary terms or subjects.
- Subentries: These are more specific aspects or topics related to the main entries, providing additional granularity.
-
Cross-References: Cross-references (often marked with "See also") guide readers to related terms or alternative headings under which related information can be found.
-
Page Numbers: Each entry is accompanied by one or more page numbers indicating where in the book the term or subject is discussed. Sometimes, page numbers may be in bold or italic to denote significant discussions or definitions.
-
Consistency: Consistent formatting and terminology are used throughout the index to avoid confusion and ensure clarity.
Purpose and Benefits of an Index:
- Quick Access: An index allows readers to quickly find specific information without having to read through the entire book.
- Comprehensive Overview: It provides an overview of the key topics and subjects covered in the book.
- Enhanced Usability: An index enhances the usability of the book, making it a more valuable reference tool.
- Time-Saving: It saves time for readers, especially in academic, technical, and non-fiction books, where quick access to information is crucial.
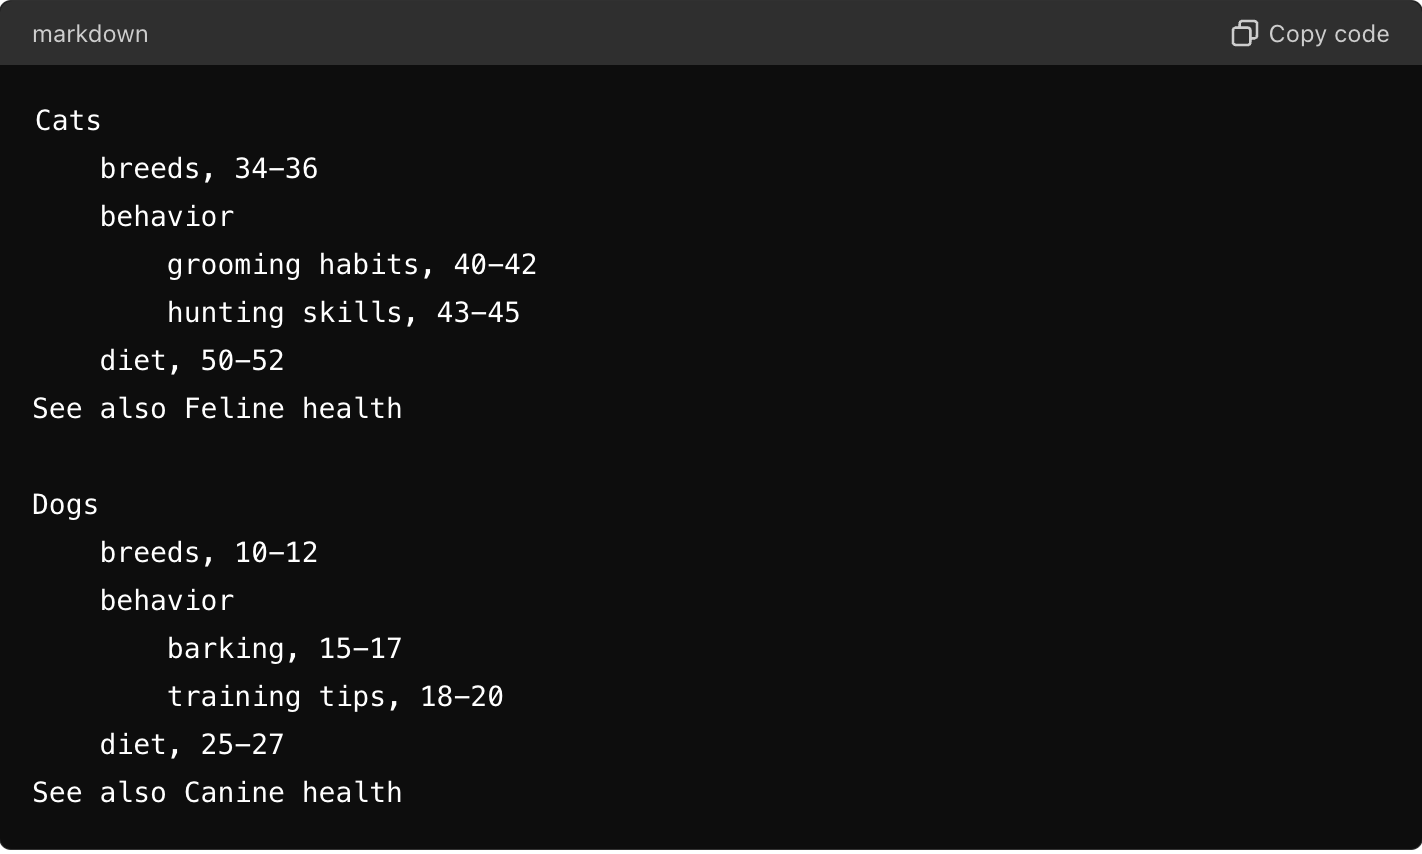
Example of an Index Entry:

In this example:
- "Cats" and "Dogs" are main entries.
- "breeds", "behavior", and "diet" are subentries.
- "grooming habits" and "hunting skills" are further subentries under "behavior" for cats.
- Page numbers follow each entry, indicating where the information can be found.
- "See also" provides cross-references to related topics.
By using an index, readers can navigate the content of the book efficiently and effectively. Here's a step-by-step guide to help you tag an index in both MS Word and Google Docs:
Indexing in MS Word
-
Open Your Document: Open your document in MS Word where you want to create an index.
-
Highlight Text: Select the text that you want to mark as an index entry.
-
Mark Entry:
- Go to the References tab.
- Click on Mark Entry in the Index group.
- In the Mark Index Entry dialog box, you can edit the entry if needed.
- Click Mark to mark the individual entry or Mark All to mark all occurrences of the selected text in the document.
-
Add Subentries (Optional):
- In the Mark Index Entry dialog box, you can add subentries by typing in the Subentry box.
- You can also add a Third-level entry if needed.
-
Cross-Referencing (Optional):
- You can create a cross-reference by entering the main entry and then entering the reference text in the Cross-reference box.
-
Format Page Numbers (Optional):
- You can choose to format the page numbers as bold or italic by checking the appropriate boxes in the Mark Index Entry dialog box.
-
Create the Index:
- Place the cursor where you want the index to appear.
- Go to the References tab and click on Insert Index.
- In the Index dialog box, you can choose the format and layout for your index.
- Click OK to insert the index.
-
Update the Index:
- If you add more entries or make changes, you need to update the index.
- Click on the index and press F9, or right-click the index and choose Update Field.
Indexing in Google Docs
-
- Google Docs doesn’t support traditional indexing like MS Word, but you can create a Table of Contents which acts similarly.
If you have any more questions or need further clarification, feel free to ask!